Installation + Adding Data
Super fast How-To
- Clean Ubuntu 18 install.
- Create username/group ace/ace.
- Add ace to sudo.
- Login as user ace.
- sudo mkdir /opt/ace && sudo chown ace:ace /opt/ace && cd /opt/ace
- git clone https://github.com/ace-ecosystem/ACE.git .
- ./installer/source_install
- source load_environment
- ./ace add-user username email_address
- Goto https://127.0.0.1/ace/ or whatever IP address you’re using.
If you run into certificate / SSL issues, see the Troubleshooting and Help section below.
Detailed Installation
Install Ubuntu Server 18.04 LST
The size specifications for your server need to be based on your needs. At a minimum, the server should have 4 GB RAM and 20 GB storage drive. When installing the server, all of the default configurations are fine.
Getting Everything Ready
The ace User
$ sudo adduser ace
$ sudo adduser ace sudo
$ sudo su - ace
$ sudo chown ace:ace /opt
Cloning ACE
As the ace user you previously created, cd into /opt and git clone the ace-ecosystem ACE master branch: https://github.com/ace-ecosystem/ACE.git:
$ cd /opt
$ git clone https://github.com/ace-ecosystem/ACE.git ace
Run the Installer
With everything ready, you can now run the ACE installer. Run the installer as the ace user. You will be prompted for the password when certain things are run using sudo. This will take a little while to complete.
$ cd /opt/ace
$ ./installer/source_install
Set Up Environment
Next, you will need to load the default environment variables ACE depends on. This load needs to be sourced from bash with the following command:
$ source load_environment
This should already be added to the ace account bashrc, so the next login should automatically load it.
Create Users
Users are managed from the ACE command line with the following ace commands:
add-user            Add a new user to the system.
modify-user         Modifies an existing user on the system.
delete-user         Deletes an existing user from the system.
Create your first user so that you can log into the ACE GUI:
./ace add-user <username> <email_address>
Log into the GUI
You should now be able to browse to https://your_ip/ace/ and log into ACE with the user you previously created.
Troubleshooting & Help
There are a couple snags and gotchas that you can run into when installing ACE. This section will detail a few, but it’s still a work in process.
SSL Errors
You may run into an SSL error that will include the following text:
Caused by SSLError(SSLError("bad handshake: Error([('SSL routines', 'tls_process_server_certificate', 'certificate verify failed')],)",),))
This error is less common when running on a local VM; However, it is fairly common when ACE is installed on a server with a domain. For example, AWS EC2 assigns a hostname such as ip-10-10-10-10.ec2.internal to their EC2 instances.
Two quick options to fix this error if you are planning on using your ACE machine with the default installation:
- Add the FQDN of your host as the ServerName in /opt/ace/etc/saq_apache.conf
- Add the FQDN of your host as a ServerAlias in /opt/ace/etc/saq_apache.conf
Then, restart the apache service (authentication required):
$ service apache2 restart
Example 1:
# /opt/ace/etc/saq_apache.conf

<VirtualHost *:443>
    ServerName ip-10-10-10-10.ec2.internal
    # Rest of the config...
Example 2:
# /opt/ace/etc/saq_apache.conf

<VirtualHost *:443>
    ServerName ace.local
    ServerAlias ip-10-10-10-10.ec2.internal
    # Rest of the config...
No Web GUI?
Make sure apache2 is running and the /etc/apache2/sites-enabled/ace.conf configuration is loaded. The ace.conf should be a symlink in /etc/apache2/sites-available that points to /opt/ace/etc/saq_apache.conf.
Alerts staying in ‘NEW’ status?
Make sure the ACE engine is running. You can do this by running the following:
cd /opt/ace && ace service start engine --daemon
Start ACE
You should now have a working installation, but you need to start the correlation engine. This is accomplished with the ace service start engine --daemon command.
Getting Data into ACE
A bare-bones ACE install is not going to be very effective without data. You can use the Manual Analysis section to submit observables to ACE. However, you’re going to want to turn on some of the additional Integrations and Modules that come with ACE by default.
Manual Analysis
Via the Manual Analysis page, an analyst can submit an observable for ACE to analyze.
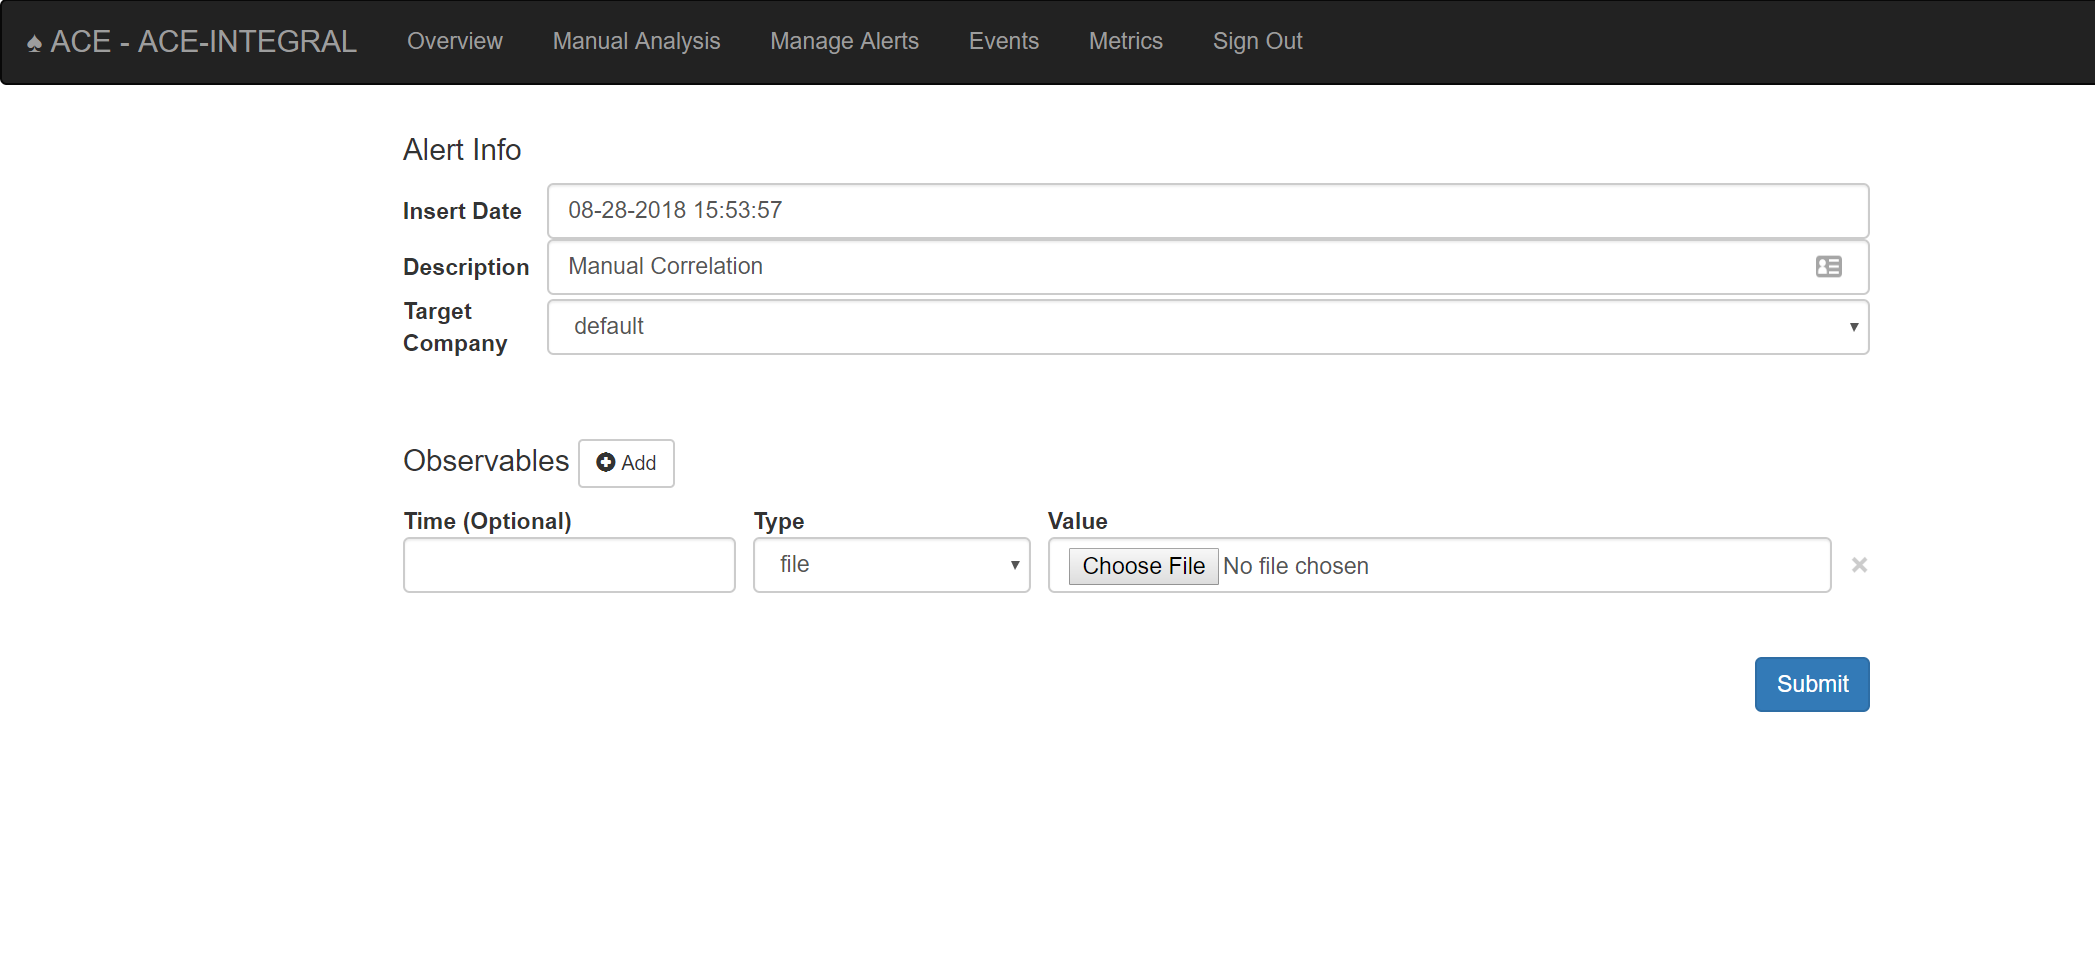
Observables can be submitted for analysis via the Manual Analysis page
By default, the Insert Date is set to the current time, and the Description is set to ‘Manual Correlation’. You can change the description to something meaningful. The Target Company will also be set to default, which should be fine for most ACE installations.
Select the type of observable you wish to correlate and then provide the value. Click the Add button to correlate more than one observable type and/or value at a time.
Shortly after you’ve submitted your observable(s) for correlation, you will see your alert appear on the Manage Alerts page with the description you provided. The alert status will change to ‘Complete’ once ACE is finished performing its analysis. You must currently refresh the Manage Alerts page to see the alert status updates.
Using the API
ACE has an API that makes it simple to submit data to ACE for analysis and/or correlation. Check out the ACE API Examples and ACE API section for more information.